If you're looking for a fun and easy Halloween treat, you are absolutely going to LOVE these Halloween OREO Cookies. These Halloween-themed Oreos are such a fun treat! They're fun to make and even more fun to eat!

It's no secret that we love Oreos around here. We're all about Oreo recipes and look for any occasion or holiday to spotlight our favorite cookies!
These Halloween Oreo cookies are super easy to make. Simply coat them in colored chocolate and add fun embellishments. They're the perfect treat to bring to Halloween parties and they're so much fun to decorate that you could actually use them as an activity to keep kids occupied at a party.
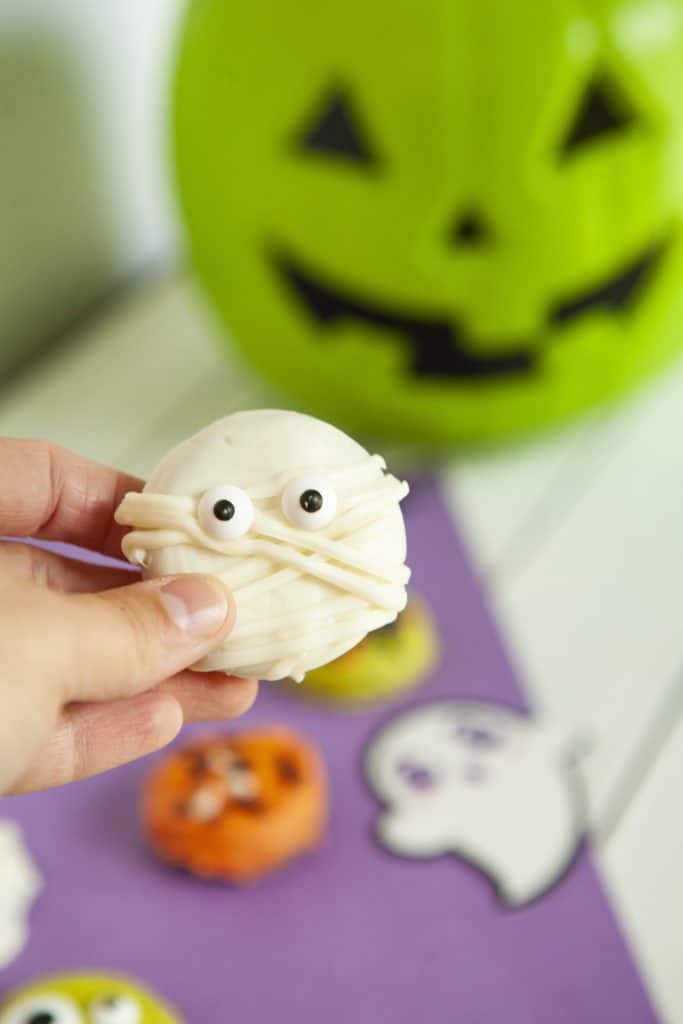
I think my favorite Halloween Oreo may be this Oreo mummy! Isn't he cute?!?
Halloween Oreo Ingredients:

- 1 package OREO cookies
- 1 pkg. Wilton Vibrant Green candy melts
- 1 pkg. Wilton White candy melts
- 1 pkg. Wilton Orange candy melts
- 1 pkg. Wilton small candy eyeballs
- 1 pkg. Wilton large candy eyeballs
- 1 pkg. Wilton mixed Halloween sprinkles
- Wax paper, parchment paper, or silicon mat
- 2 tablespoons of coconut oil (or vegetable oil)
- 1 small sandwich bag OR icing bag
How to Make Halloween Oreos
Pour your colored candy melts in three separate small bowls. You'll want each color to have its own separate bowl.

You'll want to heat your colors one at a time. If you put all 3 bowls in the microwave, they won't melt evenly or well.
Pick the color you want to start with and microwave those candy melts. I'll share separate instructions for each but as always, do what works for you.
I'm in love with the vibrant green candy melts, so we'll start with those.
Eyeball Oreos and Oreos with Halloween Sprinkles
You'll want to microwave your candy melts in 30-second intervals. I always microwave candy melts at 50% power.
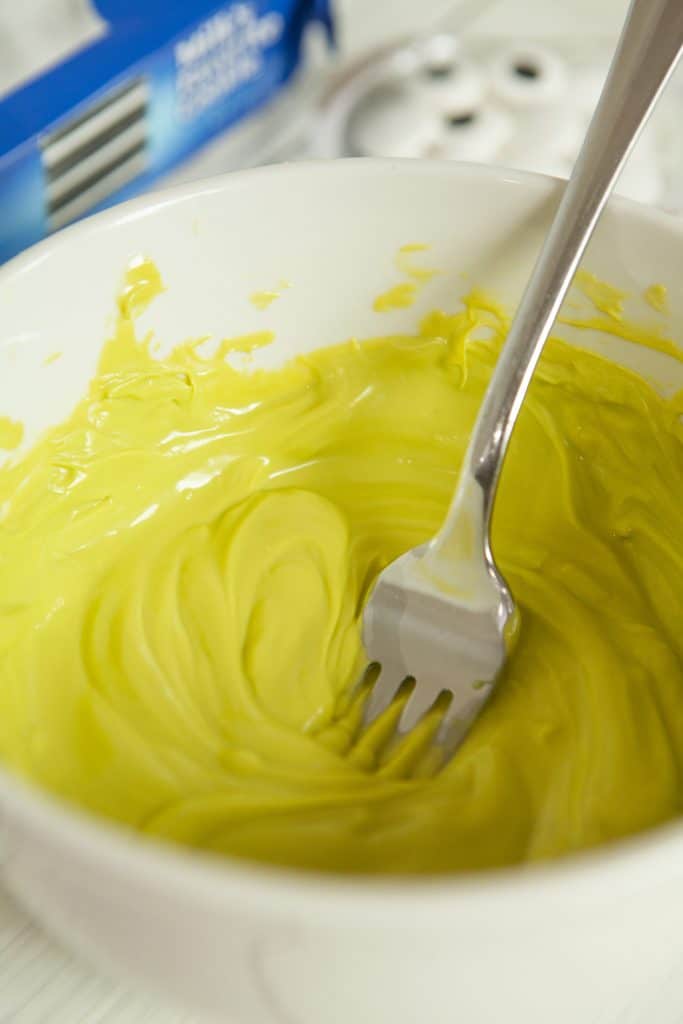
Once your candy melts are completely melted and stirred, you can add a teaspoon of coconut oil if the mixture is too thick. Do not add water or this will cause your chocolate to seize up and get hard and no one wants that!

Using a fork or a candy dipping scoop, carefully dip each Oreo into the melted chocolate until it is well coated. You'll want to gently tap your OREO on the side of the bowl so that your excess chocolate can drip off.
If you have too much excess chocolate, you'll need to trim it off later using a pair of clean kitchen scissors.

Place your dipped Oreo onto a silicone baking mat or a sheet of parchment paper. {I just got these Rae Dunn silicone baking mats and I'm obsessed. I love me some Rae Dunn…but I digress.}
When I'm just adding sprinkles to a chocolate dipped Oreo, I don't really wait very long before adding the sprinkles.

When I'm adding something heavier like candy eyes or when I'm doing a second coat of chocolate like with the Oreo mummies, I wait a minute or two til the chocolate is a little tackier.

These eyeball Oreos are throwing off serious Monsters Inc vibes and I'm totally loving it!
Allow your cookies to sit at room temperature until they are completely dry and all of your candy coating has hardened. If you're impatient, you can put them in a fridge for a 10-15 minutes, but be aware that this may cause a slight change in the color of your candy coating.
How To Make Oreo Mummies
You'll start your Oreo Mummies the same way you started your other Halloween Oreo cookies.
Melt your white chocolate candy melts for 30 seconds at 50% power. Stir well then continue to heat in 30 second intervals at 50% power until smooth.

Dip your Oreo cookies in your white chocolate and then put them on a silicone mat or a sheet of parchment paper. Let these cookies harden for a few minutes.

While your cookies are hardening, you'll want to add some of your melted white chocolate to a piping bag or pastry bag. If you don't have a piping bag or pastry bag, feel free to use a ziploc bag with the corner cut off.

If you're using an icing bag, use a small tip. If you're using a ziplock bag, snip the end off and drizzle it across the cookie for a mummy look.

You'll want to add the candy eyeballs last.

Last but not least, we have some orange chocolate dipped Oreos coated with Halloween sprinkles.
How To Make Chocolate Dipped Oreos with Halloween Sprinkles
Melt your orange chocolate at 50% power for 30-seconds at a time, stirring well between each heating until your chocolate is smooth.
Dip your Oreo cookie into your chocolate coating and set on a silicone mat or sheet of parchment paper.

After a minute, you can sprinkle with Halloween sprinkles.

Voila! You have some awesome Halloween Oreo Cookies that your family and friends are going to LOVE!
You can store you Halloween Oreos in an airtight container for about a week…although honestly, if you have a sweet tooth, you're never going to let these fun little things sit for that long.
FAQs {Frequently Asked Questions}
What type of Oreo cookies should I use for this recipe?
You can use any type of Oreo cookies you prefer, but I'd stick with the original flavor as it tends to work best for the Halloween-themed decorations described in the recipe. You can totally use Halloween Oreos with the orange cream center if you prefer as it makes for a fun surprise when people bite into their Halloween-themed Oreos.
Can I use a different brand of candy melts?
Yes, you can use any brand of candy melts as long as they melt smoothly and are suitable for coating.
Is it necessary to use coconut oil?
Coconut oil helps to thin out the candy melts for a smoother coating. However, you can also use vegetable oil if you prefer or omit it if your candy melts are already a good consistency.
Can I make these Halloween Oreo cookies in advance?
Yes, you can make these cookies a day or two in advance. Just ensure they are stored in an airtight container to keep them fresh.
Can I freeze the Halloween Oreo cookies?
Freezing is not recommended as the candy coating may crack, and the cookies may lose their texture.
Are there any variations of Halloween Oreo cookies I can make with this recipe?
Absolutely! Feel free to get creative with different color combinations, add other types of sprinkles, or create your own unique decorations. You can make spooky Halloween designs if you think that would be more fun.
Can I use milk chocolate instead of candy melts?
Yes, you can use milk chocolate, dark chocolate or white chocolate. Heck, you can even melt some Halloween chocolate, but keep in mind that regular chocolate may not harden and set as well as candy melts. You might need to add a bit of shortening or oil to the chocolate to help it melt smoothly.
What can I do if my candy melts are too thick?
You can add a teaspoon of coconut oil or vegetable oil to thin the mixture. Make sure not to add water, as this will cause the chocolate to seize.
How long does it take for the Halloween Oreo cookies to dry?
The cookies typically take around 30 minutes to an hour to dry completely at room temperature. If you're in a hurry, you can place them in the fridge for 10-15 minutes, but watch for any color changes in the candy coating.
Do I have to use a microwave to melt the candy melts?
Nope. You can use a double-boiler if you prefer to not use a microwave.
Check Out These Other Fun Halloween Treats!
Mummy Cupcakes
Mummy Cookies
Baby Frankenstein Buttercream Board
Kawaii Pumpkin Buttercream Board
Cute Bat Buttercream Board
Beetlejuice Buttercream Board
Cute Cat Frosting Board
Ghost Cupcakes
Graham Mummies
Frankenstein Cookies
Mummy Brownies
Halloween Dunkaroo Dip
Homemade Candy Corn
OREO Eyeball Pops
Spooky Spider Donuts
Pin These Halloween Oreo Cookies for Later!
Halloween Oreo Cookies

If you're looking for a fun Halloween treat, you are absolutely going to LOVE these Halloween OREO Cookies. They're easy to make and delish!
Ingredients
- 1 package OREO cookies
- 1 pkg. Wilton Vibrant Green candy melts
- 1 pkg. Wilton White candy melts
- 1 pkg. Wilton Orange candy melts
- 1 pkg. Wilton small candy eyeballs
- 1 pkg. Wilton large candy eyeballs
- 1 pkg. Wilton mixed Halloween sprinkles
- Wax paper, parchment paper, or silicon mat
- 2 tablespoons of coconut oil (or vegetable oil)
- 1 small sandwich bag OR icing bag
Instructions
- Pour your colored candy melts in three separate small bowls.
- Heat your colors one at a time.
- Pick the color you want to start with and microwave those candy melts.
- Microwave your candy melts in 30-second intervals.
- Once your candy melts are completely melted and stirred, you can add a teaspoon of oil if the mixture is too thick. Do not add water or this will cause your chocolate to seize up and get hard.
- Using a fork or a candy dipping scoop, carefully dip each Oreo into the melted chocolate until well coated.
- Place your dipped Oreo onto a silicone baking mat or a sheet of parchment paper.
- Just adding sprinkles to a chocolate dipped Oreo.
- When I'm adding something heavier like eyeballs or when I'm doing a second coat of chocolate like with the Oreo mummies, wait a minute or two til the chocolate is a little tackier.
- Allow your cookies to sit at room temperature until they are completely dry and all of your candy coating has hardened.
Originally posted September 2021
