Valentine's Day is coming up and that means it's time to start thinking about what sweet treat you're going to make for your loved ones! These Heart Shaped Chocolate Covered Rice Krispie Treats Pops are easy to make and sure to please. Plus, they're perfect for kids of all ages!

Have you ever started a project that somehow turned into 12 projects? This rice krispie treats recipe is like that. I was going to make heart shaped rice krispie treats, then I was going to make chocolate covered rice krispie treats, and then I was going to make rice krispie treat pops. I ended up making all three and thought about creating 3 separate blog posts, but since these are all Valentines Day Rice Krispie Treats, they're all going in one post!
You can use this homemade rice krispie treats recipe to make holiday shaped rice krispie treats, rice krispie treat pops or chocolate covered rice krispie treats for any occasion.
Ingredients for Chocolate Covered Rice Krispie Treats

- 3 Tablespoons butter (I used salted butter, but most chefs would say to use unsalted butter)
- 10 oz mini marshmallows (about 6 cups of mini marshmallows)
- 6 cups crispy rice cereal
- 1 drop Pink gel food coloring
- 12 oz Red candy melts
- White candy melts or other colored candy melts for extra pizazz
- Sprinkles
- Nonstick spray
- Popsicle sticks (optional for chocolate covered, but necessary for pops)
- Heart Shaped Silicone Mold
How To Make Chocolate Covered Rice Krispie Treats & Pops
To get started, melt your candy melts in 30-second intervals at medium heat until fully melted stirring after every 30 second interval.
Pour melted chocolate into your heart shaped molds making sure the chocolate completely covers the sides. If you are making rice krispy treat pops, you'll want to make sure you add your popsicle sticks right after you pour your chocolate in.

You do not want to fill the entire silicone mold with chocolate, you just want to coat it fully. Make sure you do the bottom and the sides. You can use a small spatula to spread the chocolate on the sides.

If you're worried that you didn't coat the inside of the mold well enough, you can freeze it for 10-15 minutes and then put another coat of chocolate on. You can do as many coats of chocolate as you want, just be sure to freeze for 10-15 minutes after each coat so the chocolate sets.
While your chocolate is freezing, you'll want to make your rice crispy treats.
In a large microwave-safe bowl, add marshmallows and butter and heat on high for 2-3 minutes until it's melted. Remove your marshmallow mixture and stir until smooth.
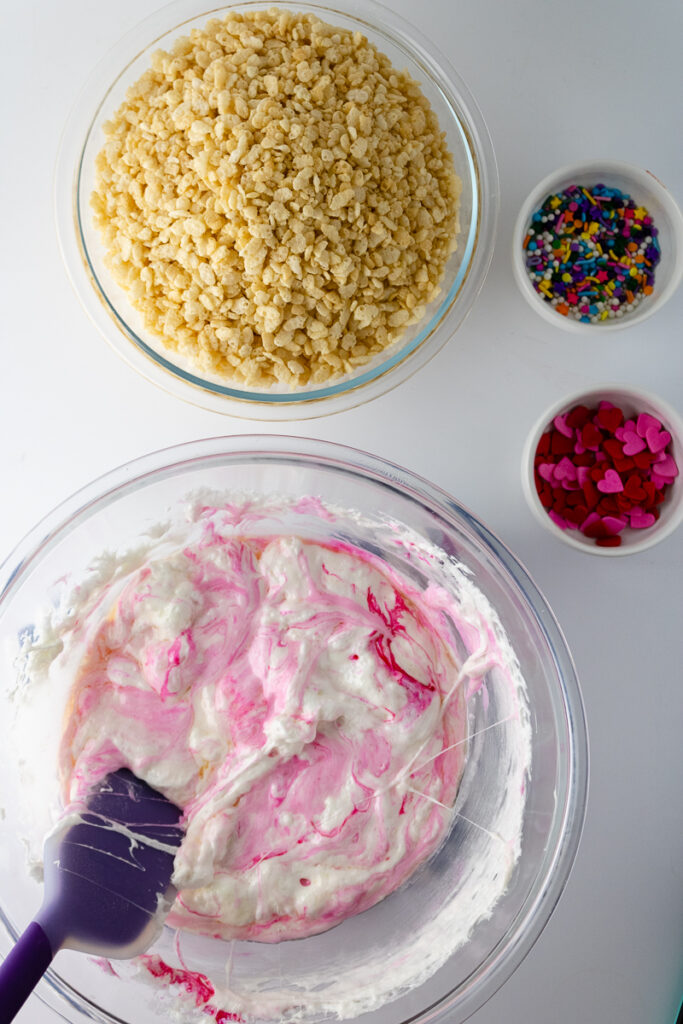
If you're coloring your rice krispie treats, add 1-2 drops of pink gel food coloring and stir well.
Next, you'll want to add in your cereal. If you're thinking about adding sprinkles, this is the time to do it.

Stir again until your cereal and sprinkles are totally mixed in.

By now your chocolate should be set in your molds. Remove them from the freezer and carefully add your rice krispie treats mixture to the molds. Don't press too hard or your chocolate may crack.
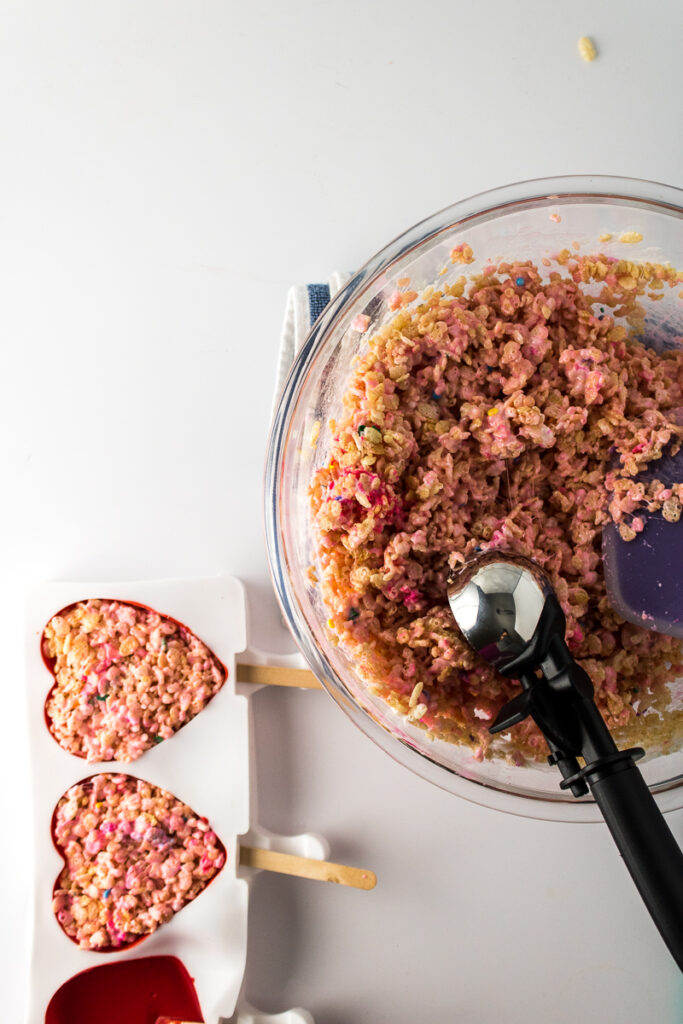
Now cover the back with more chocolate.

Place mold back in the freezer til chocolate sets.

After they've had a chance to set, carefully peel your chocolate covered rice krispies treats from the molds. Place on a baking sheet covered with parchment paper or a silicone mat.

Trim off excess chocolate with a pair of sharp kitchen scissors.

If you have a pop with cracked chocolate, you can add some melted chocolate to try to fix it or you can do what I do and just pipe extra chocolate and sprinkles over those areas.
Now you're going to melt white candy melts in a piping bag in 30-second increments. I like to use medium or medium-low heat when melting candy melts in piping bags because I'm using smaller amounts of candy melts and I don't want them to end up being weird.
Once your candy is melted, massage your bag to make sure it's fully melted and then let it sit for 1 minute.
Now cut a tiny hole in the tip of your piping bag and start making circles, lines, and other patterns. Immediately add sprinkles.
Wait 10-15 minutes for chocolate and sprinkles to set before serving.

How To Make Heart Shaped Rice Krispie Treats That Aren't Chocolate Covered

Make your pink cereal treats using the directions above. Pour into a prepared pan lined with parchment paper (sprayed with non stick cooking spray).
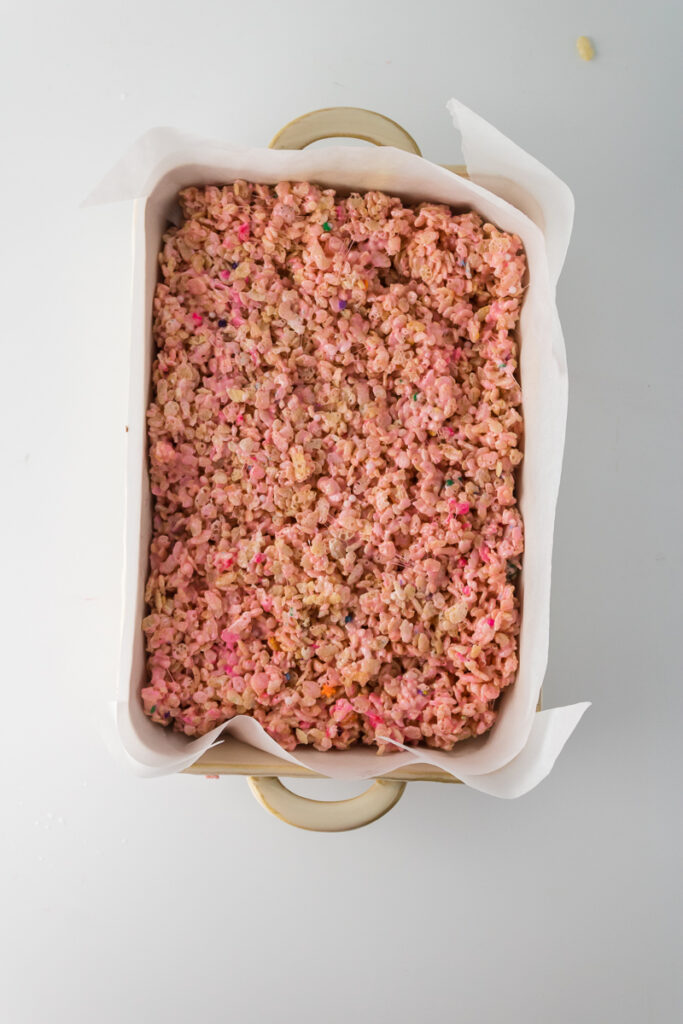
Let your rice krispy treat mixture sit for 10 mins before removing the parchment paper and rice krispie treats from the pan. Then use a 3 inch heart-shaped cookie cutter to cut out the shapes.

Drizzle melted chocolate over the top and top with sprinkles.

Let set completely for 15-20 minutes before bagging them if you're giving as gifts.
FAQs {Frequently Asked Questions}
If you make heart shaped rice krispie treats or chocolate covered rice krispie treats, you can store them in airtight containers on your counter at room temperature for 3-4 days.
If you make the chocolate covered rice krispie treat pops, you're going to have a hard time finding an airtight container to put them in. I recommend wrapping each rice krispy treat in a cellophane bag and if you want extra protection you can put all your bagged treats in a gallon size ziplock bag.
One of the great things about this easy recipe is that it's so versatile. If you want to make blue treats for a baby shower, opt for blue gel food coloring and blue chocolate candy melts. Want to make pink treats? Opt for pink gel food coloring and pink candy melts. You could also opt to use a onesie cookie cutter to make onesie shaped rice krispie treats.
You can make cupcake rice krispie pops for a birthday party. Change up the color of your candy melts according to the theme and find birthday sprinkles to decorate with.
Looking to make fancy rice krispy treats for Mother's Day or a bridal shower? You could opt to use white chocolate, dark chocolate, or milk chocolate (either candy melts or chocolate chips) and then decorate with edible gold flakes. And if you're wanting rice krispy treat pops, I think these silicone molds are fun and fancy!
This is totally personal opinion, but I feel like if you're serving these to adults the kind of chocolate you use matters. I think Ghiradelli makes delicious chocolate so if I was making these for Mother's Day, I may do Ghiradelli white chocolate chips with edible gold flakes.
No, you don't have to, but if you're looking for a more vibrant color, gel food color is the way to go.
Yes, you can use an oil based food coloring to color white chocolate chips, almond bark, or white candy melts. Do not use regular food coloring as it will cause your chocolate to seize up (which means get all hard and gross).
No, you can use a large saucepan or a large pot to heat up your marshmallow mixture. The only thing you need to keep in mind is that if you use a smaller pan, you'll need to transfer everything to a bowl before mixing in your cereal and that's a pain in the neck.
For your candy melts, you can use a double boiler instead of microwaving.
Yes. You can use 10 oz of regular marshmallows instead of mini marshmallows. It's hard to measure cups of marshmallows since marshmallows are a weird size, so I would weigh the marshmallows to ensure you have the right amount.
Yes. You can use a little bit of coconut oil or MCT oil to help thin the chocolate.
Helpful Tips
If you spray your hands with non-stick cooking spray before pressing the rice krispie treats into molds or your prepared baking sheets, it will be easy peasy to keep the melted marshmallow from sticking to your fingers.
You can use silicone pots to avoid wasting your excess chocolates. Melt your candy melts, candy bars or chocolate chips in a silicone pot. Then you can leave the leftover chocolate inside. When it's cool, just peel it out and put it in plastic wrap or a ziploc bag until you need to use it again.
Check Out These Other Rice Krispie Treats!
Easter Rice Krispie Treats
Thanksgiving Rice Krispie Treats
Finding Nemo Rice Krispie Treats
Check Out These Other Valentine's Day Treats!
Valentine's Hot Cocoa Bombs
Love Bug Cookies
Strawberry Fudge
Valentine's Day Popcorn
Pin These Valentine's Day Rice Krispy Treats for Later!

Heart Shaped Chocolate Covered Rice Krispie Treats Pops

Love is in the air with these easy to make heart-shaped chocolate covered rice krispie treats pops that are the perfect Valentines Day treat!
Ingredients
- 3 Tablespoons butter (I used salted butter, but most chefs would say to use unsalted butter)
- 10 oz mini marshmallows (about 6 cups of mini marshmallows)
- 6 cups crispy rice cereal
- 1 drop Pink gel food coloring
- 12 oz Red candy melts
- White candy melts or other colored candy melts for extra pizazz
- Sprinkles
- Nonstick spray
- Popsicle sticks (optional for chocolate covered, but necessary for pops)
Instructions
- Melt your candy melts in 30-second intervals at medium heat until fully melted.
- Pour melted chocolate into heart-shaped cavities making sure to get it completely up the sides. Make sure you add your popsicle sticks right after you pour your chocolate in.
- Fill the entire silicone mold cavity with chocolate, you just want to coat it fully. Make sure you do the bottom and the sides.
- Freeze the mold for 10-15 minutes and then put another coat of chocolate on.
- While your chocolate is freezing, make your rice crispy treats.
- In a large microwave-safe bowl, add marshmallows and butter and heat on high for 2-3 minutes until it’s melted.
- Remove your marshmallow mixture and stir until smooth.
- If you’re coloring your rice krispie treats, add 1-2 drops of pink food gel coloring and stir well.
- Add in your cereal and add in sprinkles if you’re using them.
- Stir again until your cereal and sprinkles are totally mixed in.
- Remove the chocolates from the molds and carefully add your rice krispie treats mixture to the molds.
- Now cover the back with more chocolate.
- Place mold back in the freezer till chocolate sets.
- Carefully peel your chocolate covered rice krispies treats from the molds. Place on a baking sheet covered with parchment paper or a silicone mat.
- Trim off excess chocolate with a pair of sharp kitchen scissors.
- Melt white candy melts in a piping bag in 30-second increments.
- Once your candy is melted, massage your bag to make sure it’s fully melted and then let it sit for 1 minute.
- Wait 10-15 minutes for chocolate and sprinkles to set before serving.
Originally published February 2022
Leave a Reply