Looking for farmhouse decor that won't break the bank? Ever wondered how to make fabric pumpkins? You're going to love these DIY Bandana Pumpkins.

I love holiday decor, but some of the things I love are ridiculously expensive. I found some cute fabric pumpkins, but they were over $20 each. I decided I could easily make fabric pumpkins at home.

When I found these foam pumpkins at the Dollar Tree, I knew they'd make the perfect base to my fabric pumpkin project. I had originally planned to sew pumpkins and stuff them with fiberfill, but this seemed like a much easier answer.

Our Dollar Tree also had Jute.

And craft paint… (although I have a ton of paint at home so I didn't really need this)
And an idea began to take shape!
I had some fun orange bandanas at home, so I used them for this project. Our local Dollar Tree has tons of bandana and I've seen the orange ones there in the past (it might even be where these came from), but they didn't have any orange ones when I was there last night.
Don't feel like you have to use orange bandanas for this project! Mix it up with some other colored bandanas if you feel inspired.
These fabric pumpkins make great Halloween decorations and you can keep them up til Thanksgiving!
I think these are perfect when displayed in groups of 3.
These fabric pumpkins also make cute gifts. Give one to a favorite teacher along with a note that reads I couldn't have picked a better teacher and add a pumpkin sticker to it. 🎃
Bandana Pumpkin Supplies
While all of the items I used for this project were things I had on hand or things from the Dollar Tree, I've linked to them all so that you can order the supplies and make them without ever leaving home!
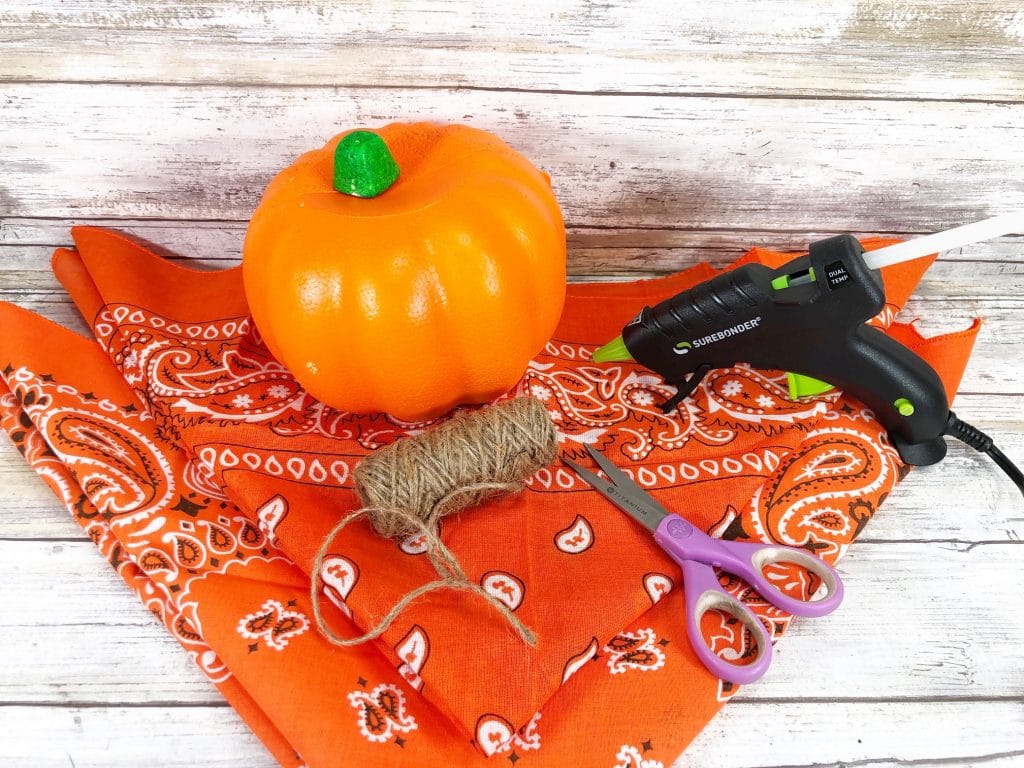
- Foam Pumpkins
- Bandanas (I used orange, but use any bandana that inspires you)
- Jute or Natural Twine
- Black Craft Paint
You'll also need these items which you most likely have laying around your house already. If you don't have a cordless glue gun, consider getting one. It just might change your life.
- Craft Knife
- Paintbrush
- Scissors
- Pencil or Chopstick
- Glue Gun and Glue Sticks
How To Make Fabric Pumpkins
Grab your supplies and lay them out where you can see them all. I am the queen of thinking I have everything I need and then having to go searching while my fingers are covered in paint or glue. It's not pretty…so be prepared.
Use your craft knife to cut a square around the bright green foam pumpkin stem. You'll want to cut deep enough to create a hole.
There will be extra foam under the green stem that you'll need to remove, but you'll want to leave the little wooden toothpick-y thing.

Once you've removed the extra foam, paint the stems with brown or black paint and set aside to dry.
Take your bandana and lay it flat on the table. Set your pumpkin in the middle of the bandana.

Take one corner of the bandana and use your finger to tuck it into the hole at the top of your pumpkin.
Continue to tuck the bandana into the hole with your finger. Use the shape of the pumpkin as your guide.

You're going to have to be a little creative while you do this. Unleash your origami skills and fold and tuck that bandana to get the look you want. Keep tucking the bandana in the hole as you go.

At some point, the hole will be too full to use your finger. At this point, use a chopstick, pencil, or your small child's finger (kidding…sort of).

Insert stem into the tops of the foam pumpkins and secure with a glue gun and glue sticks.

Cut two lengths of natural jute twine and tie them into a bow.

Finish your fabric pumpkin off with your jute bow. Voila! Pretty pumpkins that you made for next-to-nothing!

This is one of those super easy craft projects that you can whip up in 10 or 15 minutes.
Pin These Fabric Pumpkins For Later!

Need more fall home decor ideas?
Buffalo Plaid Home Decor Ideas
Fall Pillows and Fall Throws You'll Love
Fall Front Porch Decorating Ideas
DIY Bandana Pumpkins {How To Make Fabric Pumpkins}

Looking for fabric pumpkins that won't break the bank? You're going to LOVE these DIY Bandana Pumpkins made from Dollar Tree supplies! https://funhappyhome.com/diy-bandana-pumpkins-fabric-pumpkins/
Materials
- Foam Pumpkins
- Bandanas (I used orange, but use any bandana that inspires you)
- Jute or Natural Twine
- Black Craft Paint
Tools
- Paintbrush
- Scissors
- Craft Knife
- Chopstick or Pencil
- Glue Gun and Glue Sticks
Instructions
Grab your supplies and lay them out where you can see them all. I am the queen of thinking I have everything I need and then having to go searching while my fingers are covered in paint or glue. It’s not pretty…so be prepared.
Carefully cut out a square around the bright green foam pumpkin stem to create a hole. There will be extra foam under the green stem that you’ll need to remove, but you’ll want to leave the little wooden toothpick-y thing.
Once you’ve removed the extra foam, paint the stems with brown or black paint and set aside to dry.
Take your bandana and lay it flat on the table. Set your pumpkin in the middle of the bandana.
Take one corner of the bandana and use your finger to tuck it into the hole at the top of your pumpkin.
Continue to tuck the bandana into the hole with your finger. Use the shape of the pumpkin as your guide.
You’re going to have to be a little creative while you do this. Unleash your origami skills and fold and tuck that bandana to get the look you want. Keep tucking the bandana in the hole as you go.
At some point, the hole will be too full to use your finger. At this point, use a chopstick, pencil, or your small child’s finger (kidding…sort of).
Insert stem into the tops of the foam pumpkins and secure with a glue gun and glue sticks.
Cut two lengths of natural jute twine and tie them into a bow.
Finish your fabric pumpkin off with your jute bow. Voila! Pretty pumpkins that you made for next-to-nothing!
Recommended Products
As an Amazon Associate and member of other affiliate programs, I earn from qualifying purchases.

