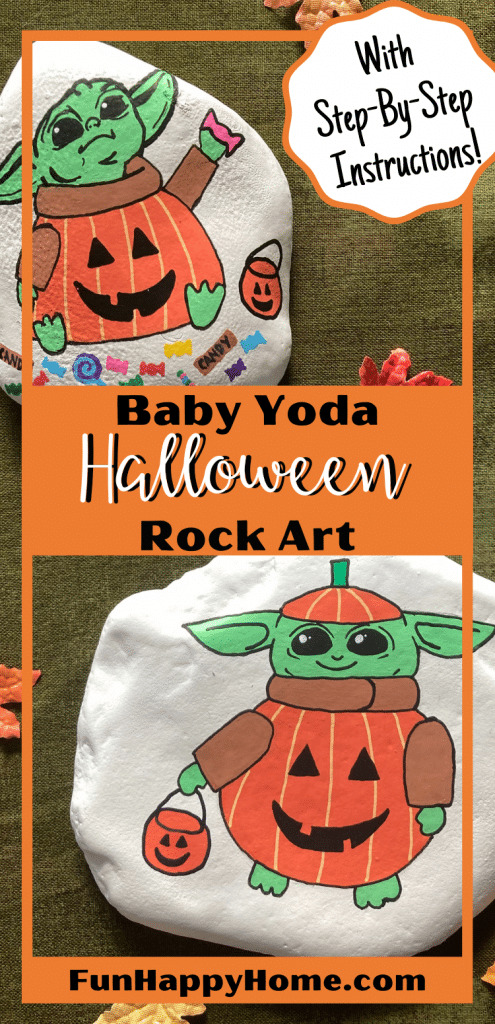
If you love Halloween and are obsessed with Baby Yoda from the Mandolorian, I highly recommend making Halloween Baby Yoda Rock Art with your kiddos. {Or heck, get together with your Star Wars loving friends to make these fun pieces of art!}

If you're looking for other fun rock art ideas, check out these Halloween Rock Art Ideas.
If you watched the Mandolorian, chances are good you fell in love with “The Child” aka Baby Yoda. Seriously…Yoda is awesome, but Baby Yoda is even more awesome!
For these adorable Baby Yoda Halloween Rocks, you'll want to start with either white rocks or rocks that you've painted with white acrylic paint. Once your rocks are completely dry, you're ready to start with the artwork.
I think posca paint pens will work best for this project. I've also included my favorite rock art supplies at the bottom of this post.
Standing Baby Yoda Halloween Rock
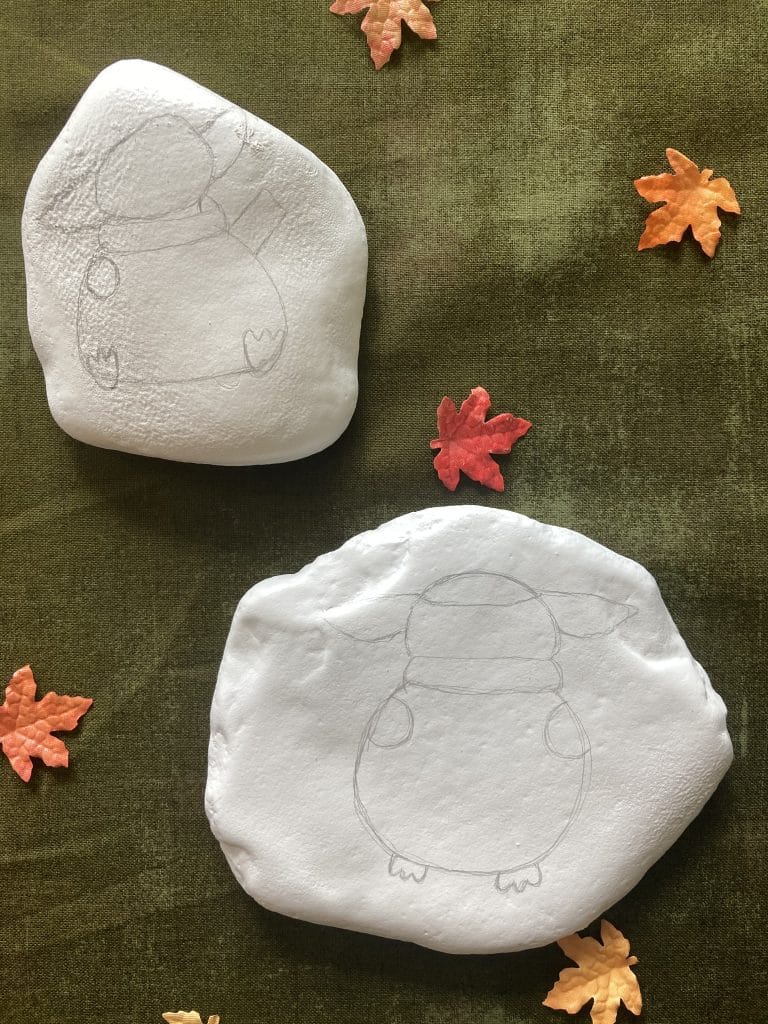
With a pencil, draw a large round pumpkin shape for the body. Add little feet sticking out of the bottom. Draw two holes where the arms will go. Draw the cowl neckline of his brown outfit underneath. Above that, draw his oval-shaped head and two large ears on both sides.
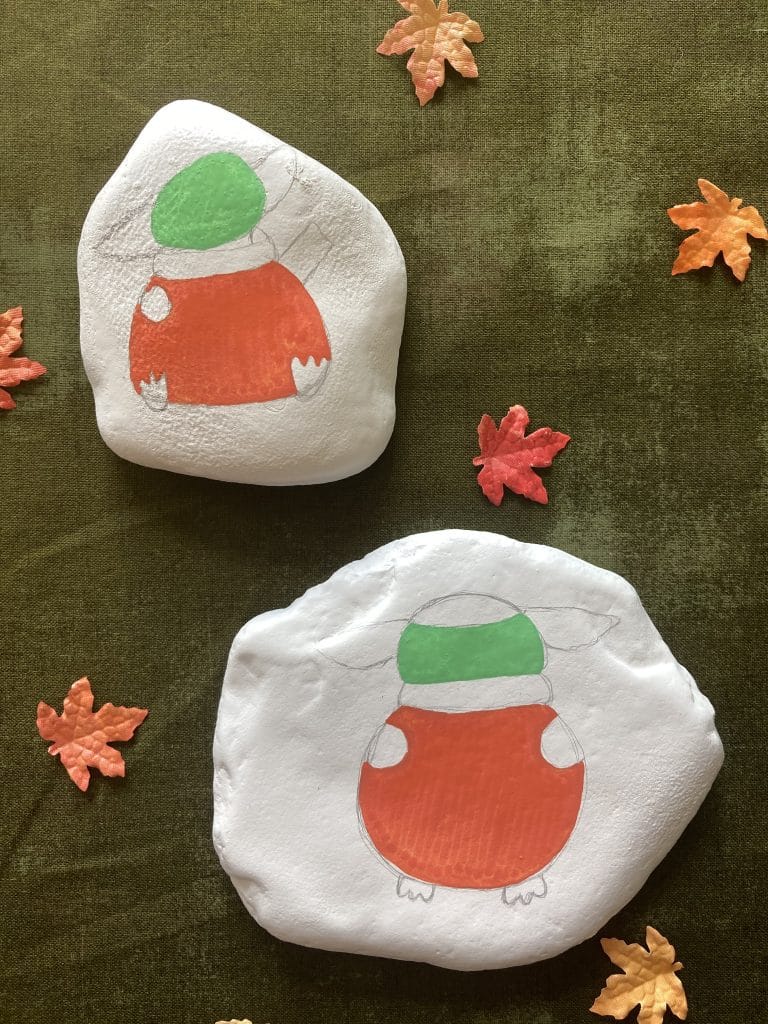
Using a paint pen, color in the pumpkin with orange and his head with green.
Color in the cowl neckline with brown.
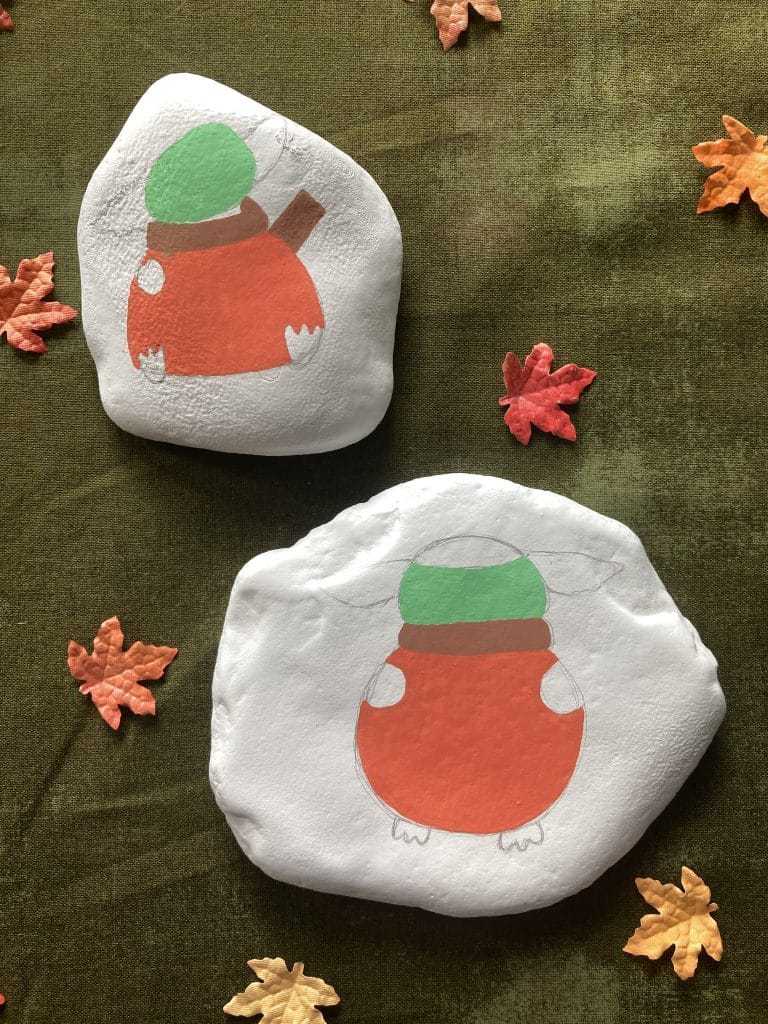
Using your pencil again, draw the outline of the arms.
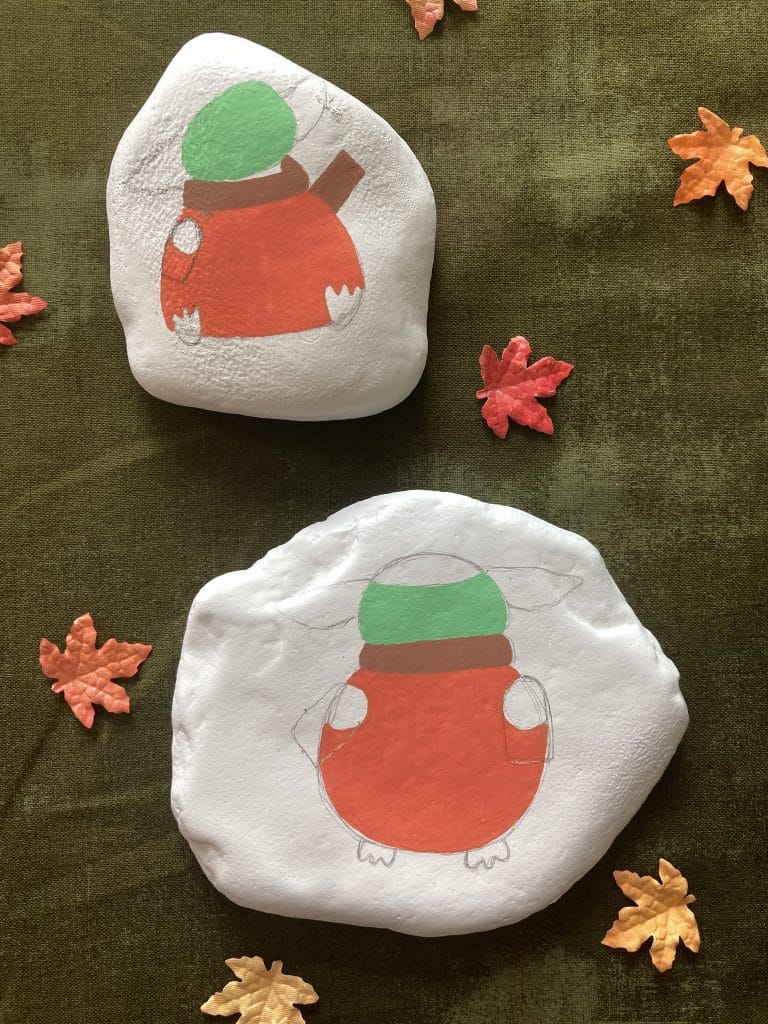
Color in the arms with brown.
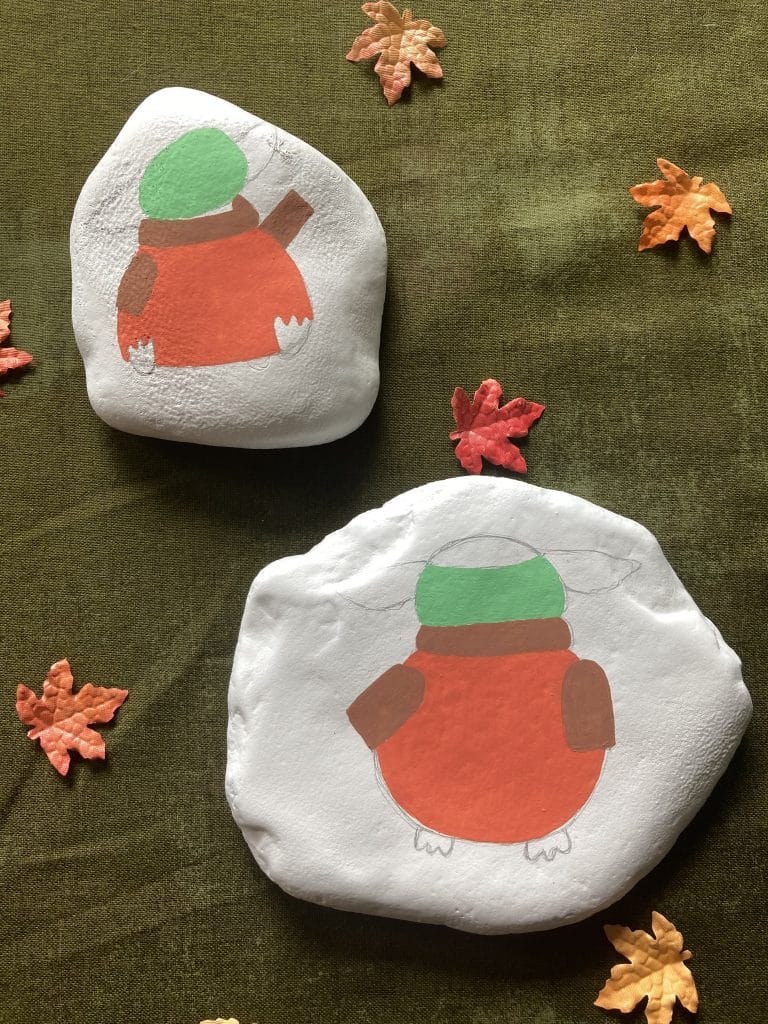
Color in the feet, hands, and ears with green, and color his pumpkin-topper hat with orange.
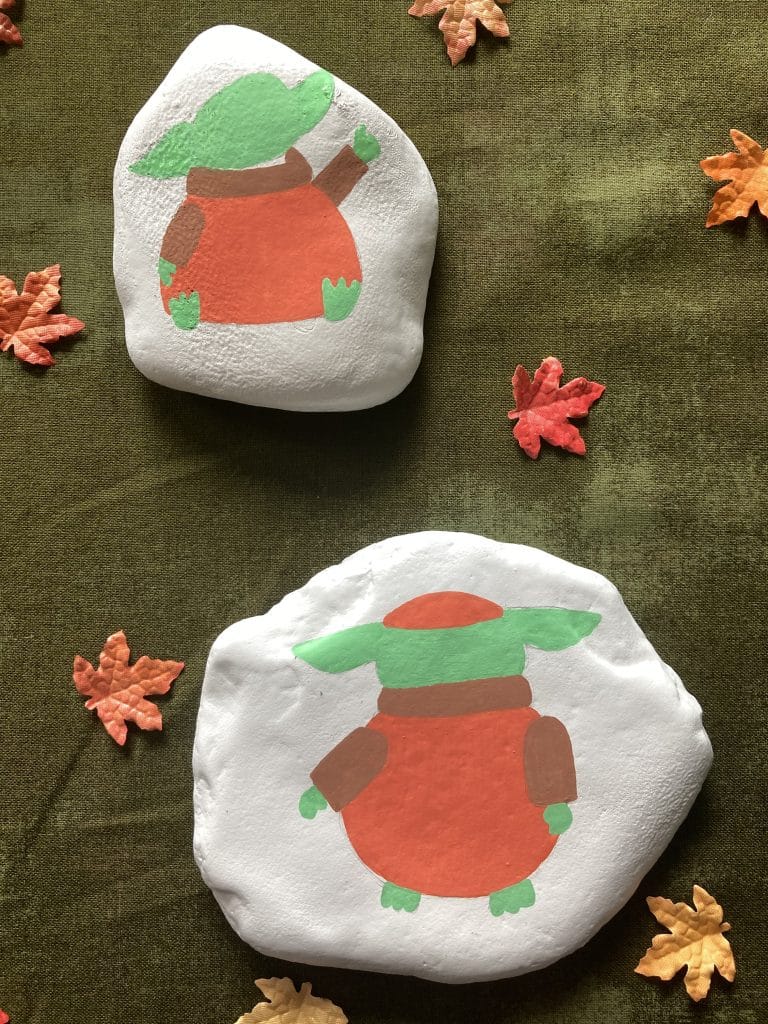
With a lighter orange color, draw lines going down to make ridges on the pumpkin and the hat.
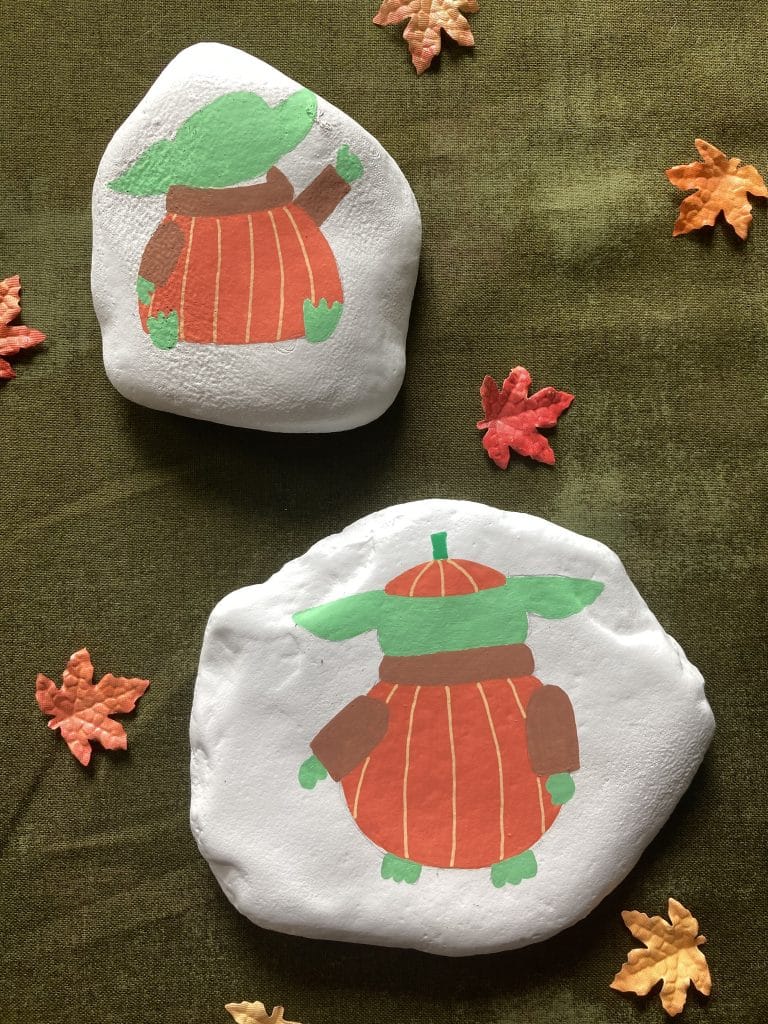
Add a green stem to the hat and a jack-o-lantern face to the orange pumpkin. Outline the entire body and clothing in black.

In his hand, color in a smaller “trick-or-treat” pumpkin bucket with orange and black.
Add large black eyes. Draw his nose and mouth. Add additional lines around his eyes and in his ears.
Add two larger white dots and two smaller white dots to his eyes.

Look at how fun your Baby Yoda Rock is! Make sure to spray your rock with sealant to complete it.
Sitting Baby Yoda Rock
With a pencil, draw a large round pumpkin shape for the body, but slightly “squished” as the picture depicts him sitting. Add little feet sticking out of the bottom. Draw one hole where his right arm will go. On the other side, draw an arm in an upward stance. Draw the cowl neckline of his brown outfit underneath. For his face, draw a slightly off-center oval as if he were looking upwards. Draw two ears on both sides.
Using a paint pen, color in the pumpkin with orange and his head with green.
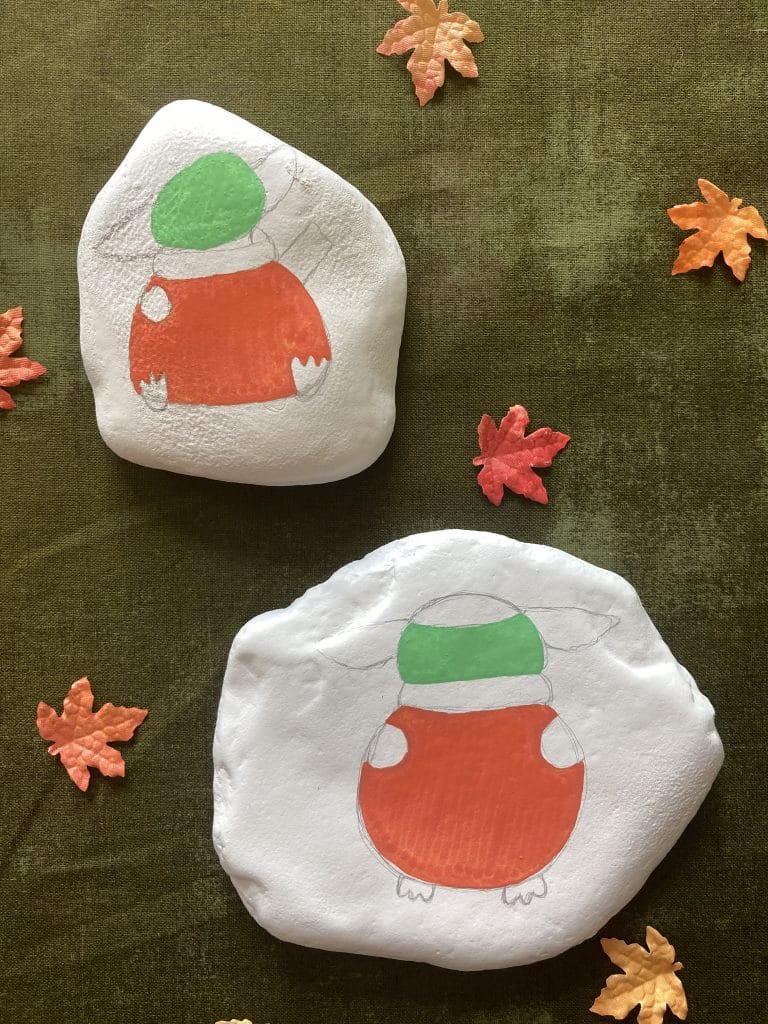
Color in the cowl neckline and the left arm with brown.
Using your pencil again, draw the outline of the right arm.
Color in the right arm with brown.
Color in the feet, hands, and ears with green.
With a lighter orange color, draw lines going down to make ridges on the pumpkin.
With black, add a jack-o-lantern face to the orange pumpkin. Outline the entire body and clothing in black.
In his left hand, color in a piece of candy.
Below his body, color several pieces of candy that he has collected whilst trick-or-treating.
On his side, color in a smaller “trick-or-treat” pumpkin bucket with orange and black.
For his face, using black, draw two big eyes, slanted at an angle so it looks like he is looking upwards. Add a small nose and mouth. Draw lines around his eyes, cheeks, and chin. Add additional lines to the insides of the ears as well.
Add two small white dots to the eyes.
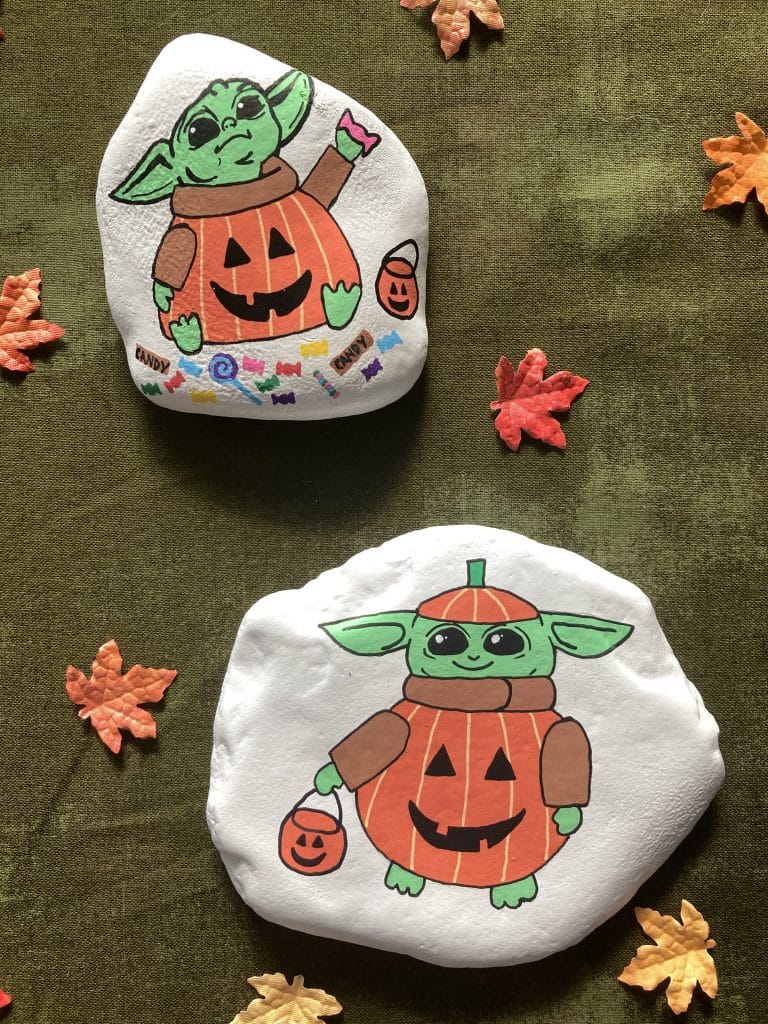
You did it! You created an adorable Sitting Baby Yoda! Now…make sure to spray your rock with sealant to complete it.
Rock Art Supplies
- Rocks
- Pencil with eraser
- Pens
- Paint
- Paintbrushes
- Paint Pens
- Gel Pens
- Sealant
- Glue
- Glitter
- Any fun decorations that you’ll want to glue onto the rocks {I’m a big fan of pompoms and googly eyes and this kit has both}
Rock Painting Tips & Tricks
For starters, you’ll want to make sure your rocks are clean and free from dirt and grime. I like to use water and a dish brush to clean our rocks. I typically keep some Dollar Tree dish brushes on hand for projects like this.
Once your rocks are clean and dry, you can begin creating your designs. I find it’s helpful to lightly trace your design with a pencil first.
If you want to paint your rocks, acrylic paint works best.
If you plan on using paint pens or regular pens to create your masterpieces, here are my recommendations.
If you’d like to glue anything to your rocks, I swear by E6000 {FYI: it is important to seal your rock with sealant prior to gluing items!}
I also recommend sealing your rocks after you’ve finished decorating them. You can use whatever finish you’d like (glossy, matte, etc). These can be found online or in your local craft stores.
Rock art is supposed to be relaxing and fun. Enjoy yourself! Be creative! And don’t stress!!!
Looking for a Star Wars Snack to go along with your Baby Yoda Rock Art? Check out these Star Wars Oreos! They're super fun!
Pin This Baby Yoda Rock Art for Later